

A beautiful and well serviced valley that can feel remote and wild at times.
I’ve been ice climbing to Cogne three times now and it remains my favourite European destination for ice climbing. Why? It is relatively straightforward to get to; you can get absolutely loads of climbing in a short period of time; there is a great spread of routes throughout the difficulty range; you can climb in the sun (with care and planning) and the coffee and pizza are to die for! What’s not to like?
The Aosta valley lies in the North Western area of Italy and borders France at the famous Mont Blanc. The climbing is situated in the heart of the Gran Paradiso National Park which hosts some of the most breathtaking mountain scenery in Itlay. Conditions are some of the most reliable in The Alps and so it can be busy during peak times. But in all the years I’ve been going I’ve never had to really queue for a route and there are so many to choose from that you can easily be flexible with your route options.
It is quite straightforward to get to by car or a combination of air and car if you are pressed for time. You can go by train from London, via Paris and Milan and there is a regular bus service from Aosta to Cogne and onto Lillaz. I’ve flown twice and this year Richie and I drove from Leeds. This took tyhe best part of two days through France, stopping at Bethune on day one and then onto Chamonix and through the tunnel on day 2. It is cheaper than flying and car hire if there are just 2 going. There is also the added bonus of the drive reducing the carbon and pollution footprint. On reflection though I think if you are just visiting for a week then you will gain an extra day (even a day and a half if you get you flight times right) of climbing by flying.
Be careful with your car hire options when flying one year we made the huge mistake of hiring a car from the Swiss side of Genva airport. This worked fine on the way out but proved very tricky to find on the return trip. Being pressed for time we had to return the car to the French side and was slapped with a 99 Euros bill!! I’ve also flown to Milan and driven from there; which was nice and you also save 54 Euros on the Mont Blanc tunnel. If you are driving through the tunnel remember to ask for an ‘aller retour’ (a return ticket) as if you don’t the total bill will be 87 Euros! In then end there are more flight options to Geneva (I fly from Leeds if I can or Manchester if I can’t) than Milan. Turin is even closer and knocks over half an hour off the travelling times but is more expensive. Geneva and through the tunnel is the usual option. Be careful though, buy an ‘aller retour’ as it’s much cheaper than a single trip both ways.
The tunnel can close at any time without warning, for a variety of reasons so it’s best to leave plenty of time on the return journey. Another warning is to make absolutely sure that you return your hire car to the correct side of the airport, Kev and I were rushing once and made the mistake of returning our hire car to the Swiss side of the airport, they were happy to have the car returned – but we ended up €90 poorer! We could even see the office for the French side through the door – but hey that cross border paperwork can be very expensive!
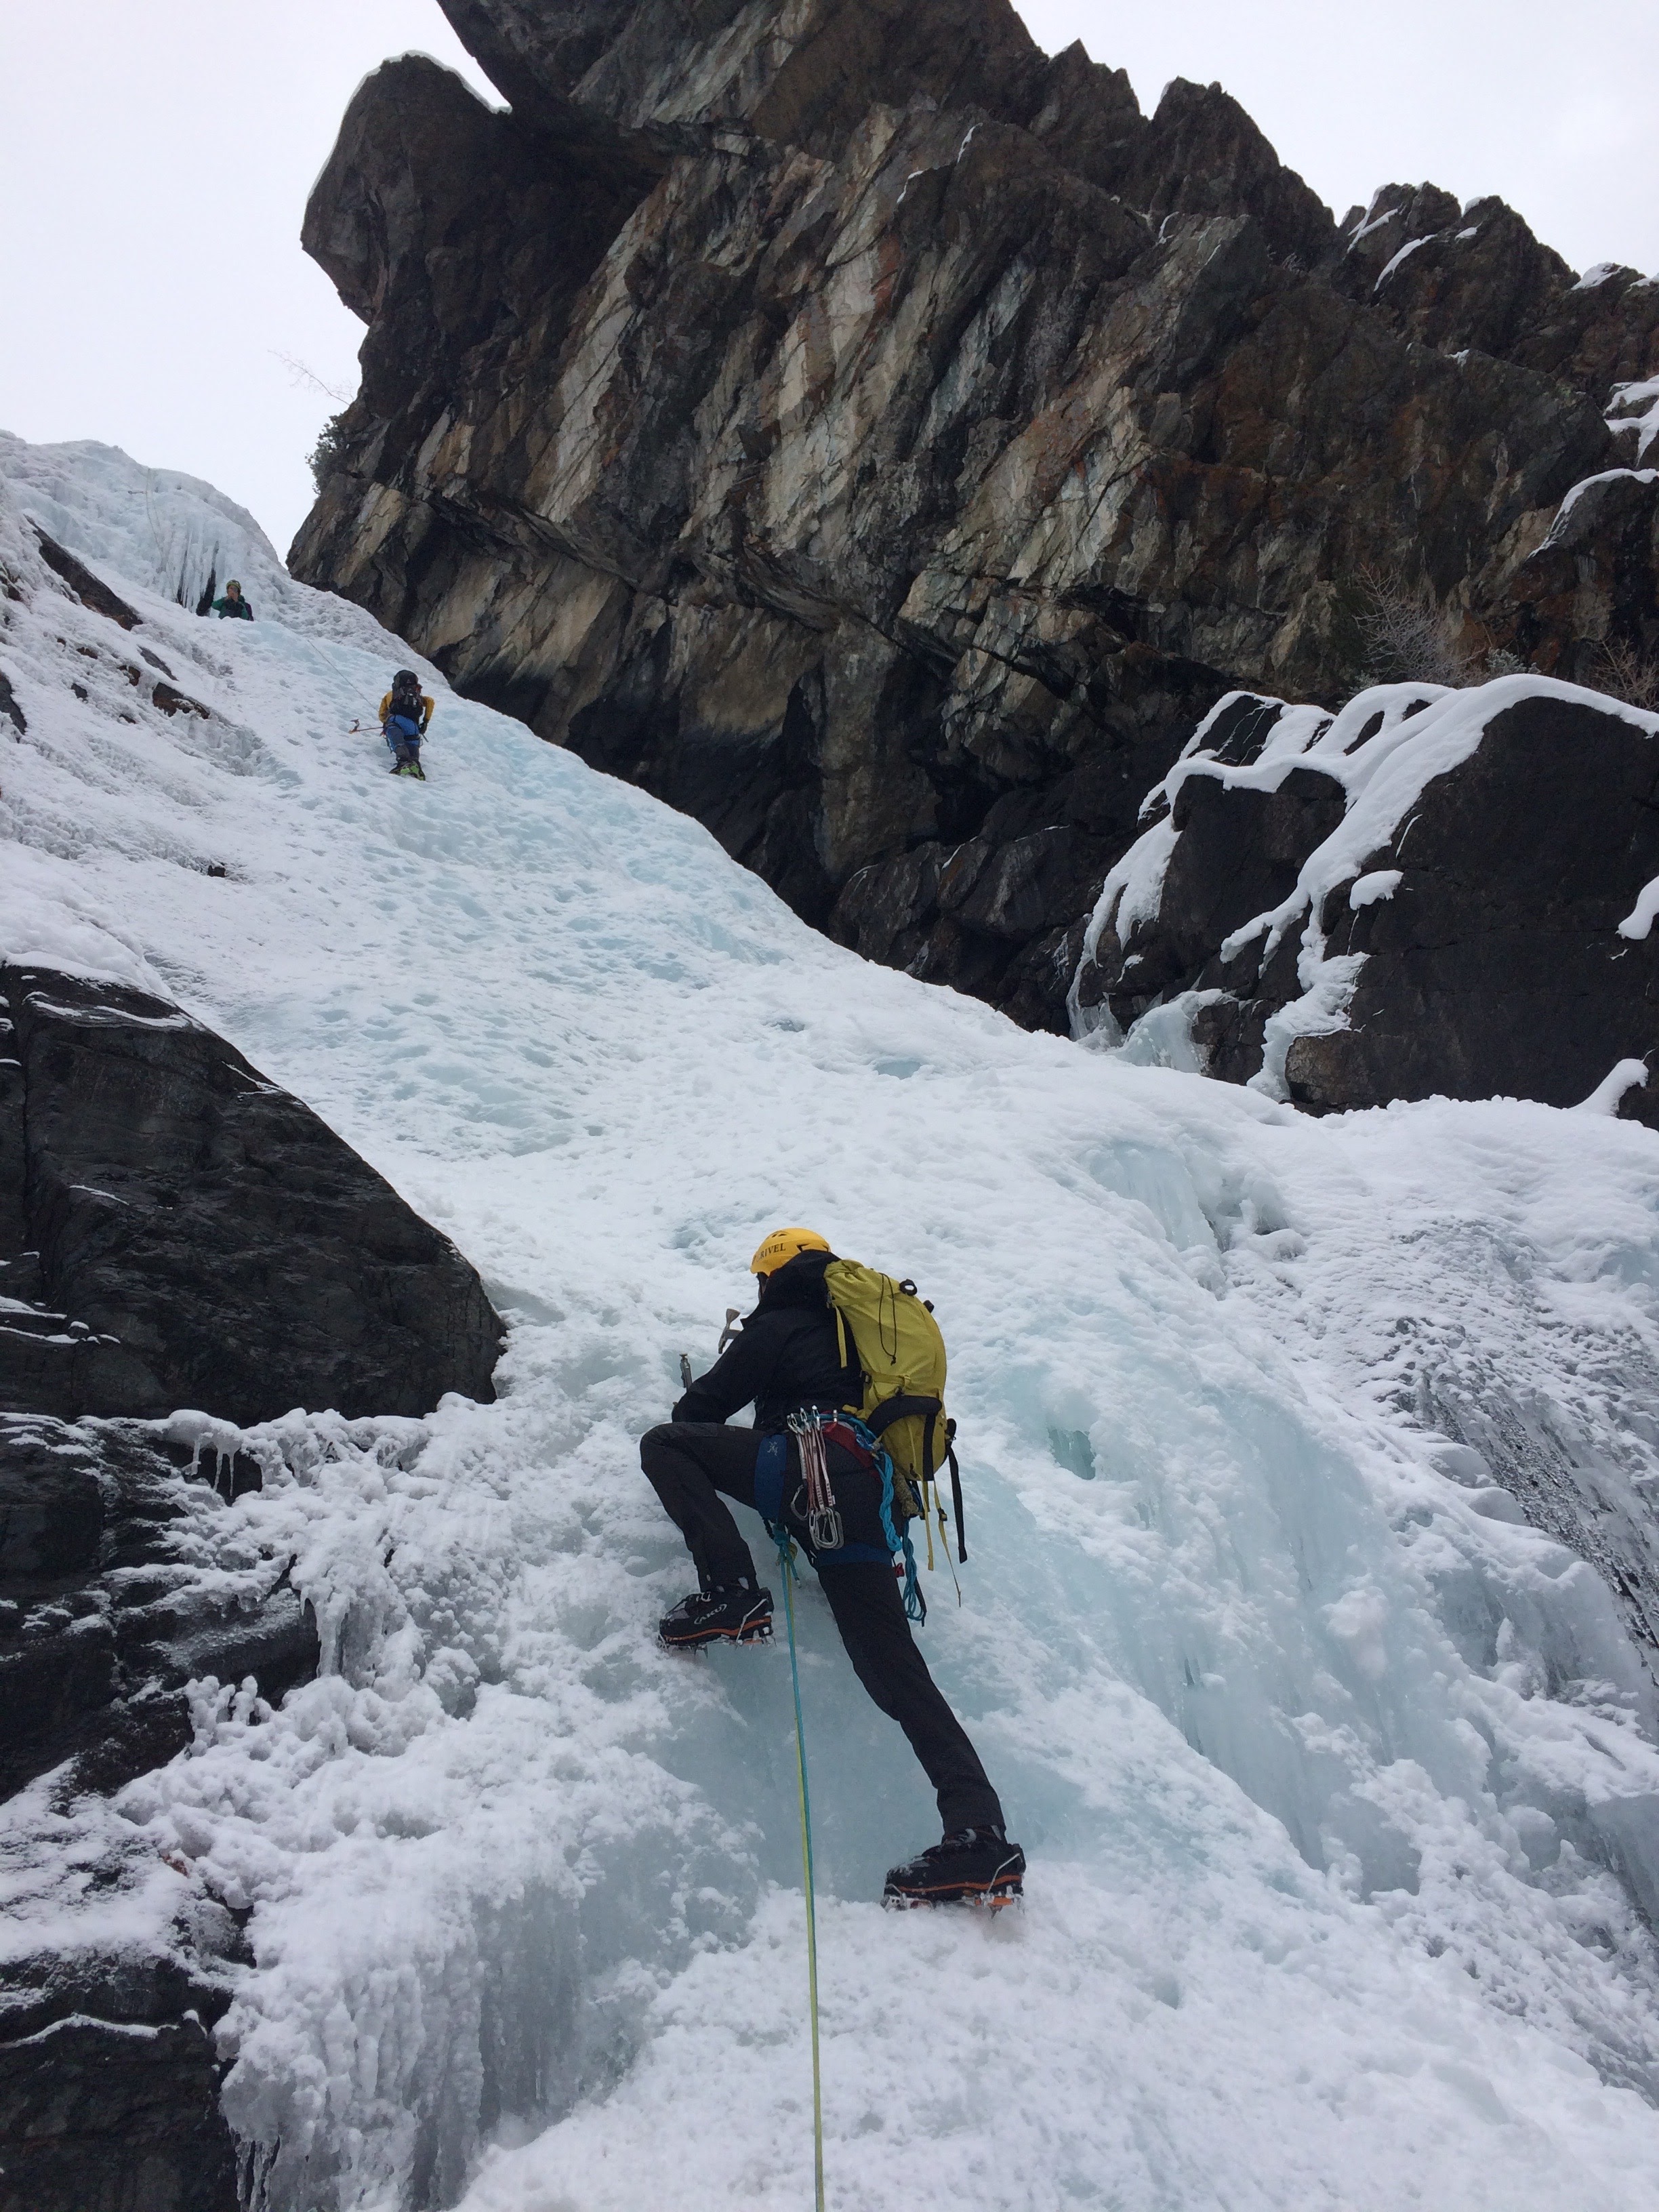
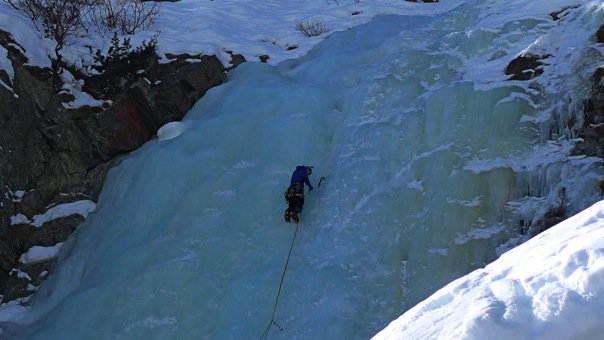
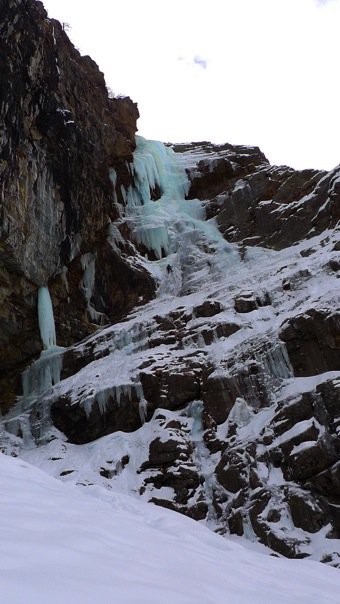
The climbing is situated in two main areas, Lillaz and Valontey. Both are valleys that run from their respective villages with Lillaz running from, well Lillaz and Valontey running from Cogne. Both valleys have an amazing selection of classic routes that would easily keep you busy for a week if you were just visiting one of them. There is very little difference in the style of climbing, both valleys offer a wealth of fat ice with bolt belays and bolted abseils. There will only be the occasional belay that involve Abalakovs but the ones I’ve used have usually had them in situ (be very careful and check any in situ belays, if in doubt replace old tat and even re drill if necessary). So apart from the climbing the belays and descents are very convenient. This means you can often get a couple of routes in in a day, especially if you just do the hard pitch as the second route.
The routes tend to be multi pitch and usually between 3 an d 6 pitches long and they are mostly one to two steep pitches with shabbier ones, or even walking, in between. Both valleys have a sunny side so if you are planning a route on the sunny side it’s best to get up earlier as the tops of the routes get the sun in the early afternoon and can get very wet and even dangerous at times. On some days though we have found ourselves climbing in just a baselayer on the top couple of finishes. There have also been some hairy times too with very drippy and plastic ice! When I say early though, we’re not talking Alpine starts here – a 7.30am start will often find you first on the route and back in town for cappuccinos and cakes at lunchtime!
With transport it is very easy to get between the valleys and both climbing areas have plenty of parking (parking fees apply, although we never saw an Italian pay for parking!) and there is a bus service between Cogne and Lillaz. If you are using public transport I would suggest basing yourself in Cogne as the walk to Valontey is longer and the approaches are longer too. It’s much easier to get the bus up to Lillaz and then walk into the route from there. There is a regular bus service from Aosta to Lillaz so the journey from Cogne to Lillaz is pretty straight forward and unless you are on a a big route (like Cold Couloir) or having an epic then you should get the last bus back OK.
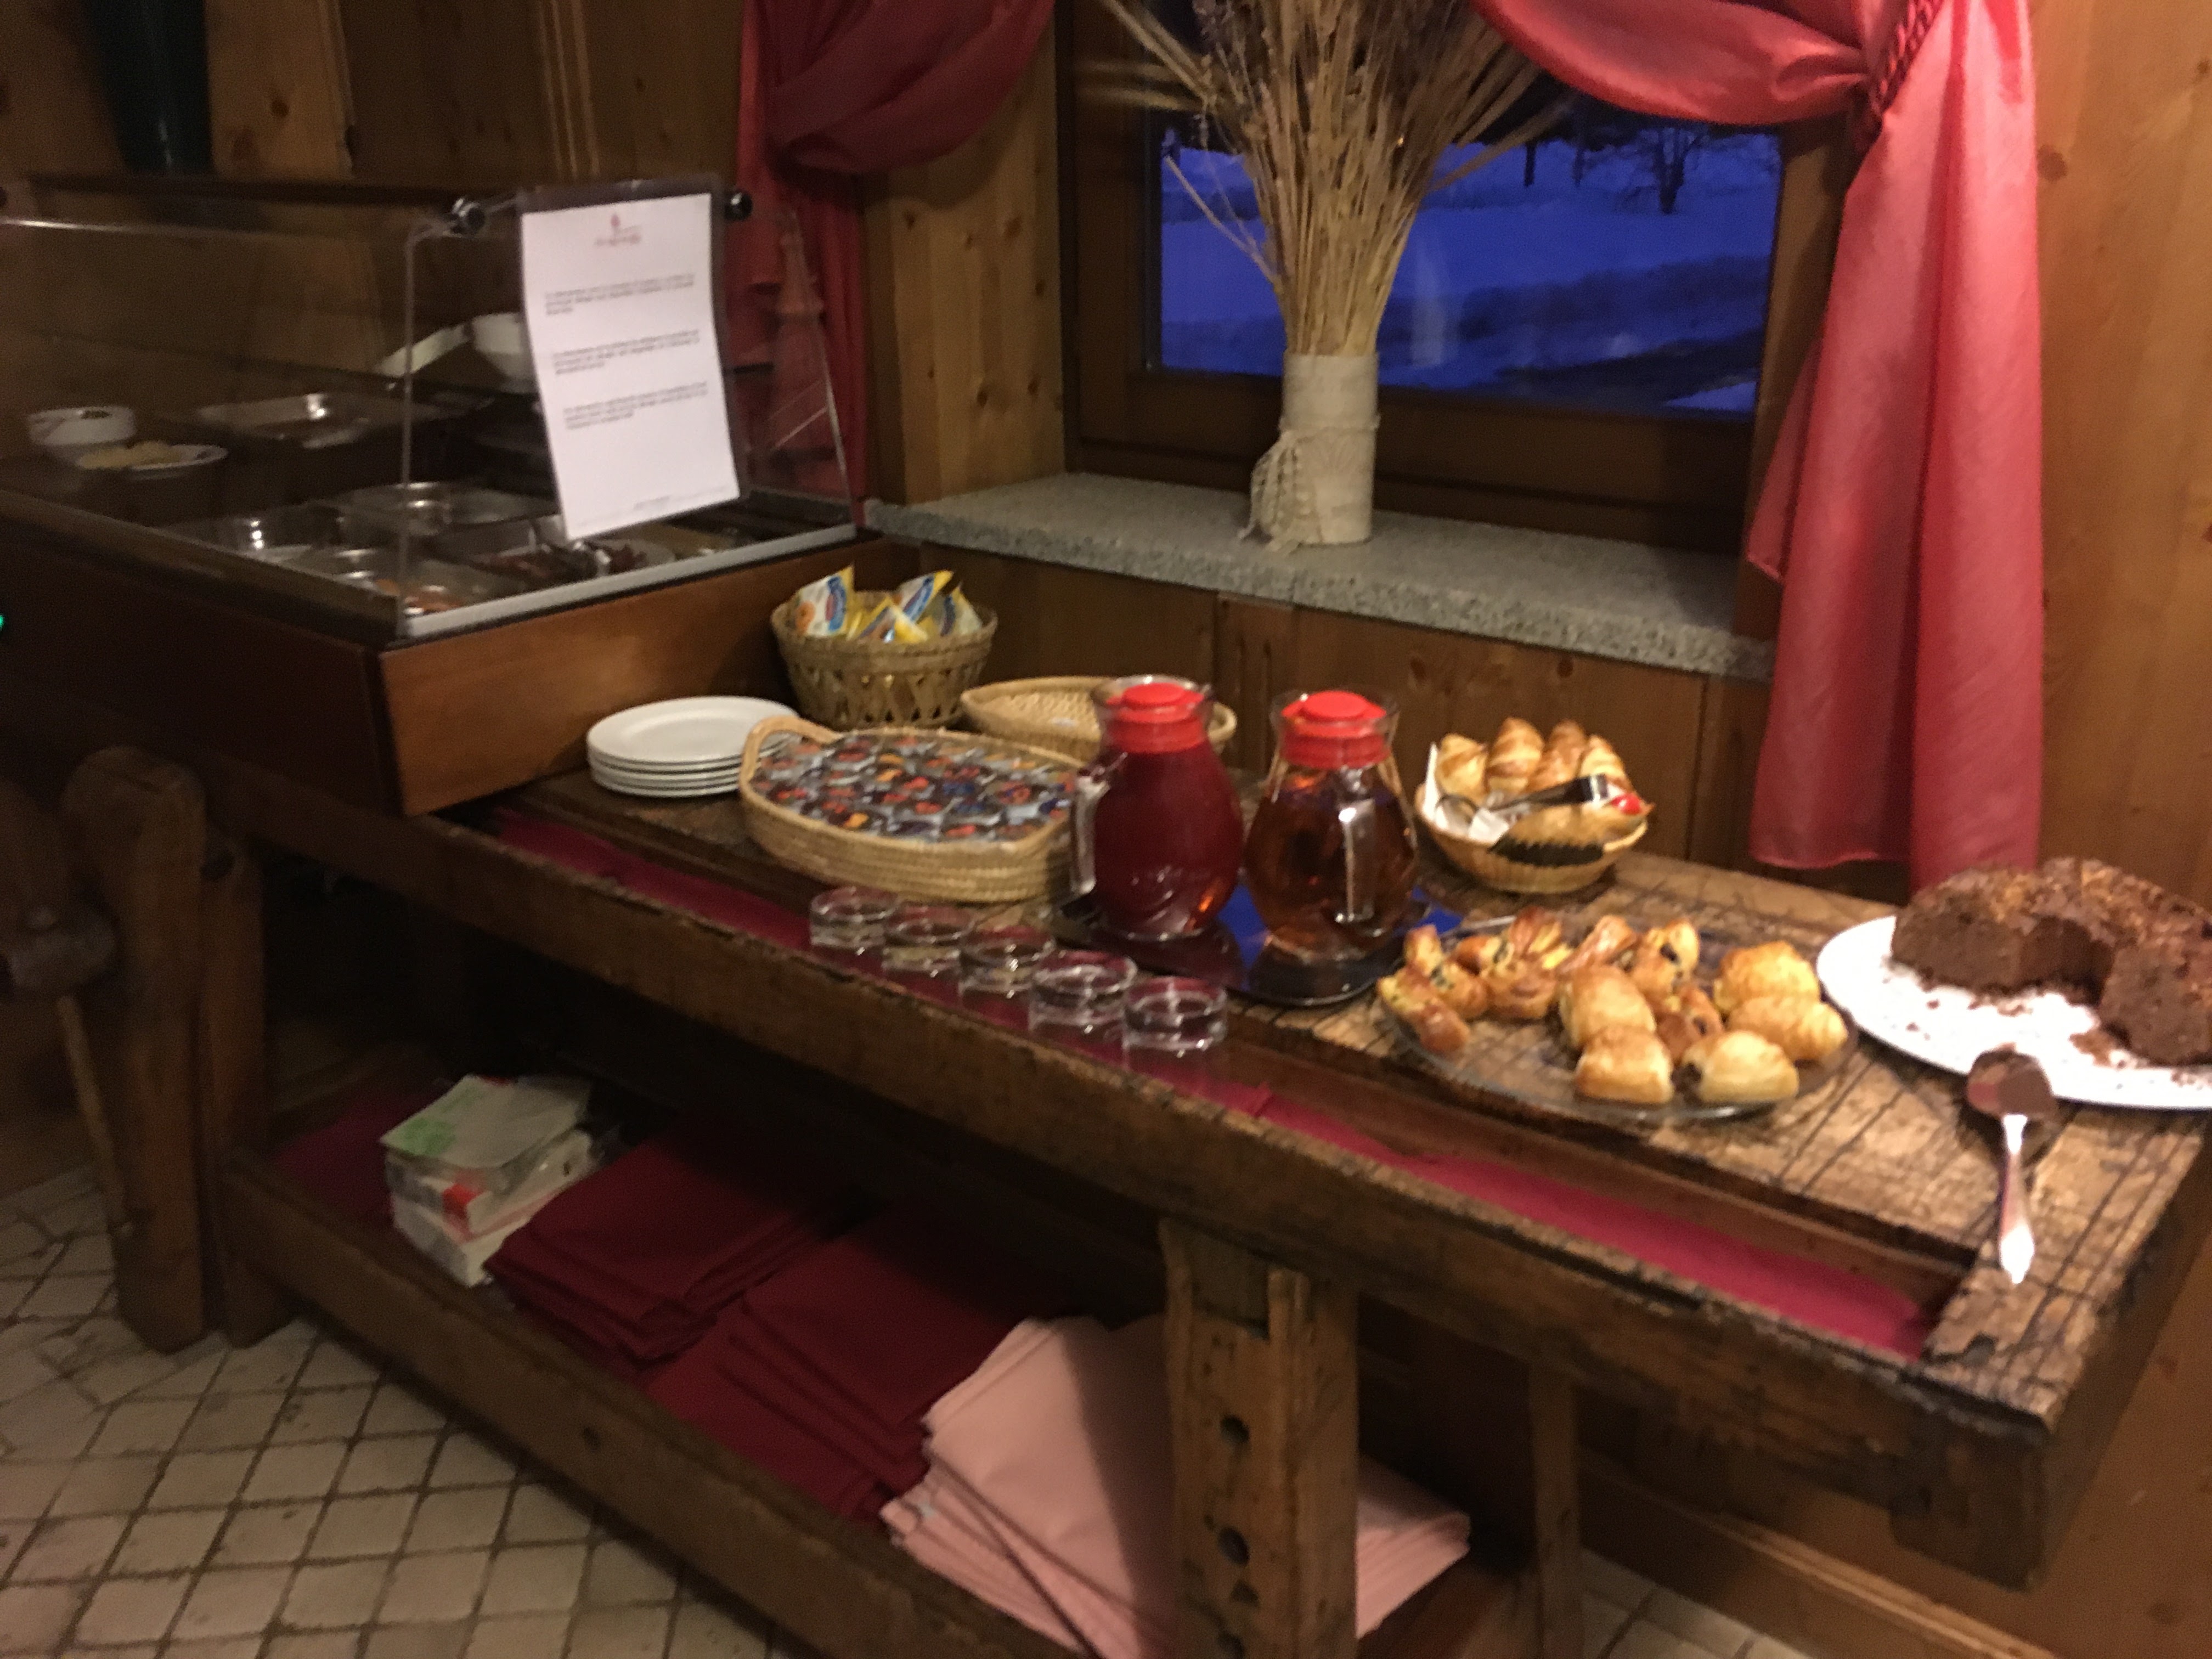
The area has plenty of accommodation options but nothing on the super budget side. Cogne is well served as it has a pisted ski area and has a variety of hotels, apartments, shops and bars. The supermarket is also there. When the CGR team have been we have stayed in Lillaz at Les Nigretelles, owned by Carlos and his wife Elisa. It’s apartment style accommodation, with spacious rooms, TV, WiFi and a cavernous drying room complete with vice and file for sharpening blunt tools. The apartment is self catering but we’ve always opted for the great breakfast that offers cereals, bread and cold ham and cheeses as well as great coffee. Carlos has a wealth of local knowledge as well as a strong interest in Italian politics – you have been warned! Although, I found it a great way to enjoy breakfast and pleasant conversation. Lillaz is very quiet with a coffee shop and bar and a restaurant, I’ve usually headed down to Cogne for beers and pizza where there is lot’s of choice but our favourite is Al Tarabas hidden up on the left on Rue Des Clementines just off the main Valtoney road, fabulous Italian pizza and you can buy beer by the litre (Dave recommends the Marinara apparently!)
Here we offer a recommended route list. All the routes have been done by the CGR team and we can vouch for their quality. They are all accessible, have straight forward descents and are straight forward to find (in Lillaz the routes are often signposted off the track!!);
Lillaz Valley
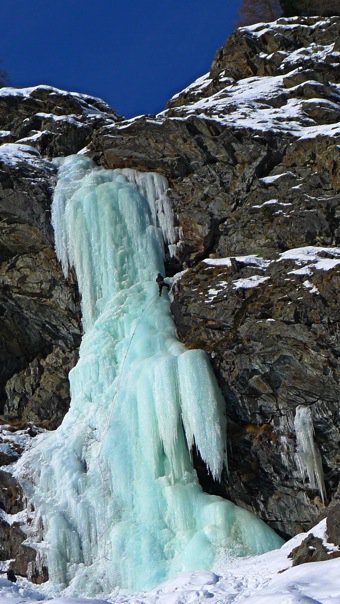
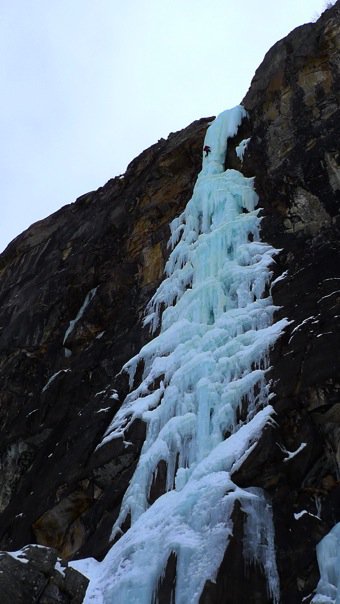
Cascata de Lillaz
Only the most popular route in the area and so good we’ve done it every trip! Literally 5 minutes flat walk from the village. You can bypass the steep first pitch and access the other pitches by a short pitch and walk from on the left (you pass it on the way in) but it is well work doing.
A handy bolt appears when the ice thins out at the top and then a nice fat double bolt belay. After that it’s walking along the stream bed to a short steep section and then a great big 50m 65 degree pitch and then another couple of pitches to the top. Depending on conditions beware iced over pools – some are quite deep enough to get your feet wet all the way up to your waist or worse! In some years you have to scramble around the rocks to the side to stay dry. When we did it in 2017 the top pitch had no ice on it and we had to use some Scottish winter experience to top out! From the top head off right (looking out) along the path and back to the village. Brilliant and unlikely you’ll find yourself alone (the Guides use it a lot but the route is plenty big enough to accommodate everyone).
Lillaz Gully II/4
A more adventurous proposition that Cascata de Lillaz, with a steep, thigh burning approach, some steep pitches and bit of mixed climbing thrown in and a longer walk off (the path meets the Cascata path back to Lillaz). A great adventure – Scotland as it should be!
Tuborg III/4
Steep and pumpy is the name of the game on this great route. You could empty your whole screw rack into the fat ice curtain – if you can hang on of course! A little bit of walking and some smaller steep pitches will have you finishing in the sun and back in village for lunch or even another route if your on top form.
Cadelabro del Coyote III/4
Very similar to Tuborg with steep pumpy climbing on a big cigar. Plenty of nice bolted belays and short enough to get another route in. Again you’ll be finishing in the sun and the main pitch can be wet.
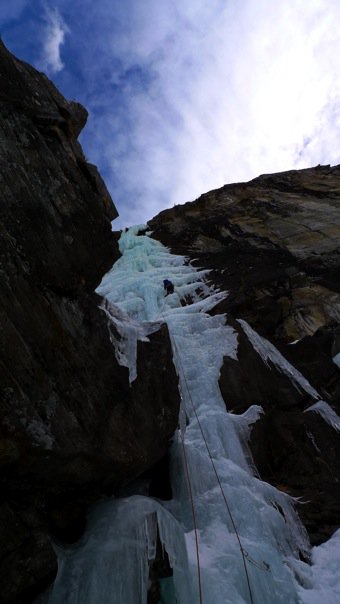
Cold Couloir IV/4+
Having had our eye on this for the previous couple of years Richie and I decided to do it. You can see it clearly from most routes on the other side. A classic Scottish steep Ice gully – think massive Thompson’s Route on Ben Nevis with bolted belays :-). Two massive (just making the belay on 60m ropes and plum straight climbing!) and very steep ice pitches lead to another steep pitch. Most people ab off from here but a little bit of walking along with the odd bit of climbing leads into an amphitheatre with another massive pitch of high quality ice. This pitch will be tougher as not many do it and it’s unlikely to be tracked out. In 2017 the level of the gully was lower than normal meaning this final pitch was longer than 60m (I’d wondered why there was a hanging Abalakovs or buried sling 6m up the route!!). Exit on the left and look for the bolt belay on the rock (tricky to find). We saw steps leading to the very top but we opted to ab off. You need to avoid this route after snowfall as it’s avalanche prone. An awesome route and a full day out.

Valontey
Patri III/4

Another Uber classic that will often be busy, especially the Condelone de Patri which can get insanely busy! A classic and excellent first pitch, easier on the left but still steep enough, leads to a traverse and a tricky exit into a icy chimney (with a handy bolt to clip). You can ab off here but is much better to finish further up (no belay) and the traverse right (looking up and often tracked). This leads to a little down step and an ab station at the top of the Candelone. You can then ab down this and if you’re up for it have a go at the steep pitch. You should have it to yourself by that time instead of the usual 3 teams climbing it at the same time. Have a good look as it’s wet and fragile in warmer temperatures.
Sogno di Patagonia III/4
Just past the tiny hamlet of Vermiana on the hydrographic left of the valley you’ll spot a magnificent cigar that forms the start of the beautiful Sogno di Patagonia. Sogno di Patagonia takes the cigar at a very amenable grade 4 and then winds its way up a gentle snow slope to an ice choked rocky cleft. Brilliant and sunny climbing with a short walk in – what’s not to like? Descent is via abseil.
Monday Money III/4
This and the next route are Big Ben Nevis type days out. A 2 hour walk in and a very steep approach leads to a monster route up a corner system that leads to a huge curtain. Big, burly pitches and a good level of fitness will be needed for success on this route. Expect to finish late and walk out in the dark. When Richie and I did it we were the only people on it whilst the next route was rammed.
Repentance Super III/6
If you found Monday Money too easy get yourselves on THE route of the area, everyone has come to do this right? The awesome looking freestanding curtain that will always have a team on it. Steep, tenuous and sometimes fragile climbing with hard to find gear – you’ll need every ounce of ice climbing experience to be successful on this. I haven’t done this route, Kev did and said it was one of the best routes he had done. Rich has it in his sights so maybe we’ll get it done next time we’re there. I’ve also seen a team ski the descent after doing the route.
That of course is only a selection, which should keep you busy enough for a one week holiday. There loads more to do in both valleys and in the three trips I’ve been I’ve only repeated the Cascata (which is a great rest day route). The area also has some fantastic cross country skiing (watch out for the skaters!), piste skiing in Cogne itself and brilliant snow shoe hiking. On those warmer, snowy days there are a few dry tooling routes for those bored of drinking coffee and eating cakes. These are found in the definitive guide.
Guidebooks – we use the ‘Alpine Ice’ by Mario Sertori (English) guide which has a great selection of routes (all the ones recommended here). The definitive guide ‘Effimeri Barbagli – Cascate di ghiaccio in Valle d’ Aosta’ by Matteo Giglio (Italian) which you would need if you were visiting more than twice covers the Cogne area and a whole lot else besides in the Aosta region. Although in Italian the clear photo topos and L’Escursionista 1:25,000 map extracts make it easy to use (especially if you have a smartphone with the Google Translate app) but it’s pricey (€40!) for a single trip. You may be able to find the old ‘Cascades autour du Mont-Blanc (volume2)’ by François Damilano and Godefroy Perroux (French) guide too which is dated but far more pocketable. There is a map of the area ‘Valle di Cogne – Gran Paradiso L’Escursionista Editore 10’ which can be handy if you are intending to top out on Cold Couloir. There is/was an excellent free map showing most of the ice climbing routes and cross country ski routes in both valleys. This is available from tourist information, most hotels and some bars

The Ultimate Kit List for Ice Climbing in Cogne
If you’re new to ice climbing or just looking to replace some older bits of your rack we suggest the best kit to start you on your cold and icy adventures:
Ice Screws – Petzl Laser
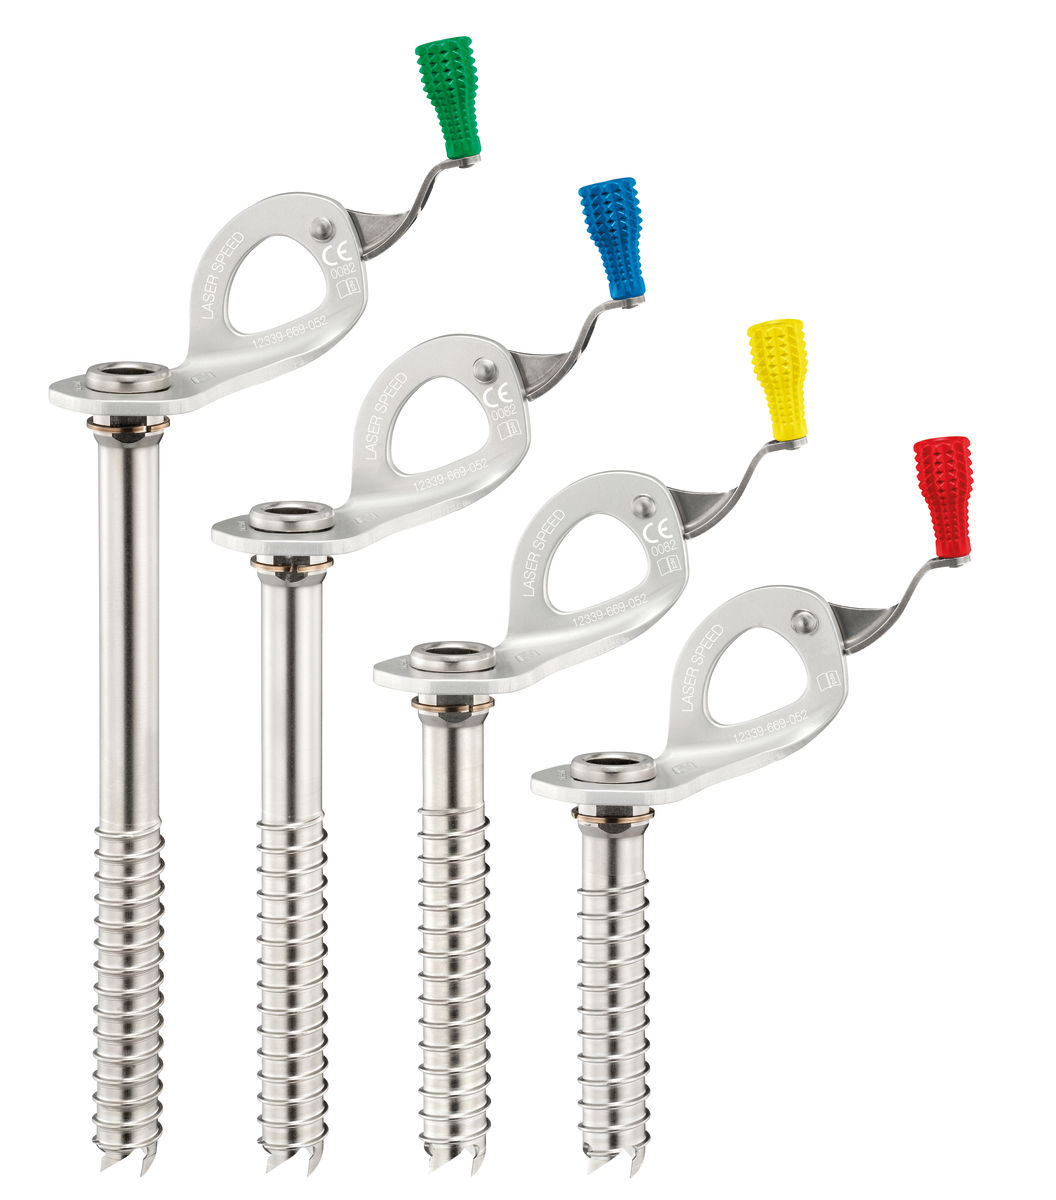 Petzl Laser Ice Screws – you definitely don’t want to faff around when placing screws. There is a technique and the most important thing is that first bite. You want that screw to bite well and truly first rotations so it won’t fall out. The Laser Ice Screw collection from Petzl are great all round performers, the budget end Laser screw has all the same front teeth as the more expensive ones but not the handle, so great if you’re on a tight budget. The next model up the Laser Speed adds a handle which greatly improves the speed at which you can place and strip the screw, essential on those steep pumpy pitches and if you want to go uber light the the Laser Speed Lite replaces the steel shaft with an aluminium one. Still the same sharp steel teeth though to ensure that you get that initial bite. We have always found the Petzl Laser ice screws superb performers and an essential piece of kit. Always remember to clear the tube of ice when you take them out (but not by blowing – unless you want them to stick to your lips that is!).
See Petzl for more details and stockists.
Pack – Lowe Alpine Ascent Superlight 30
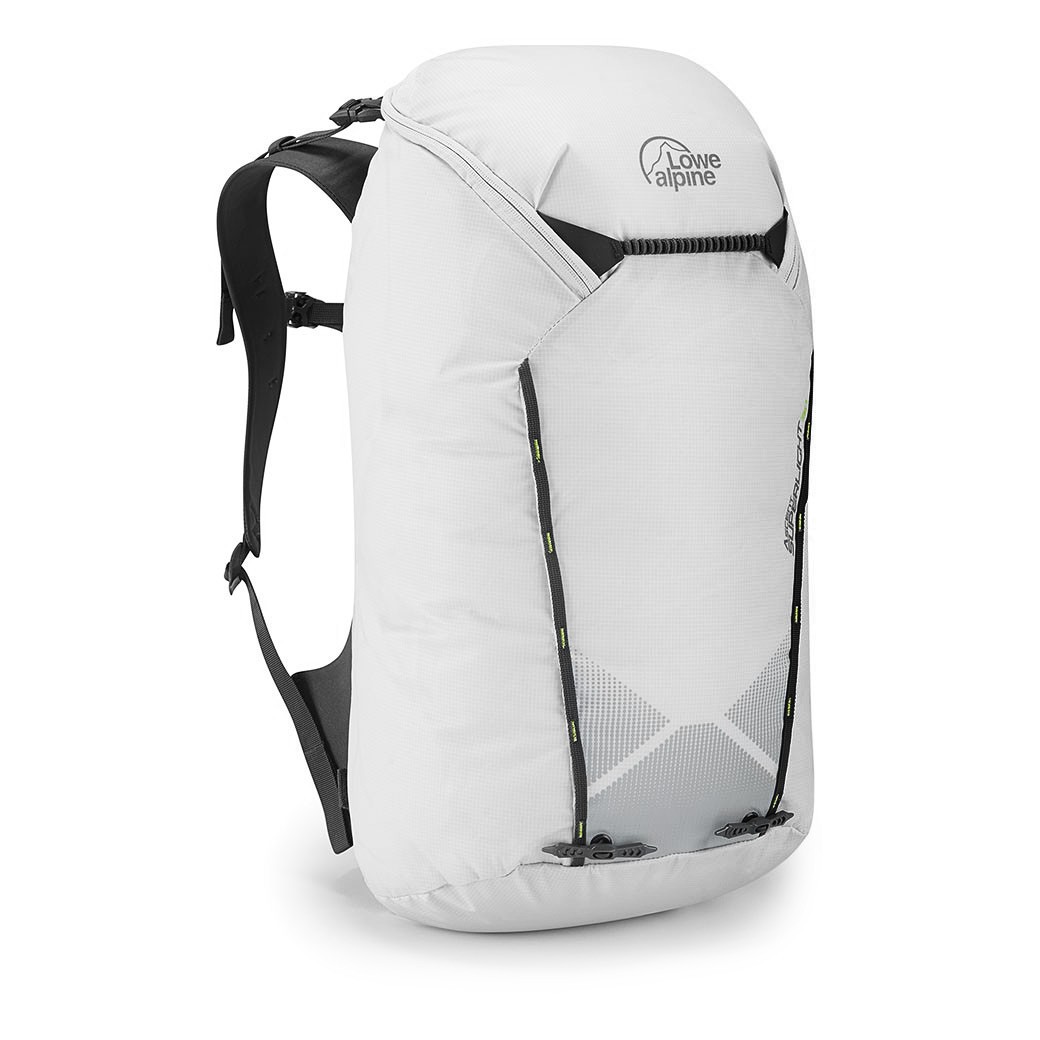 You don’t need a huge pack for your day out as you will mostly be leaving packs at the bottom of your chosen route – there are a few routes where it’s easier (usually because they are super busy) to walk off. That said you may as well opt for a nice lightweight one that feels great to climb with. The Ascent Superlight 30 is the lightest pack Lowe Alpine make. The 30L capacity is more than enough to get all the essentials into it as well as carrying well for those longer approaches. Stripped of all the faff that other packs have its a honed down, no nonsense pack that would be fine for a full day, don’t panic if you get benighted on Monday Money, the fold out bivvy mat will provide some solace and the coated Trisheild fabric will keep the odd drip at bay.
See Lowe Alpine for prices and availability.
Boots – AKU Serai GTX

We reviewed these fully in 2017 and found them to be a brilliant winter boot. Super light and stiff enough to cope with the steepest of pitches, yet versatile enough for tricky mixed rock and even some drytooling. When the weather turns snowy, the integrated gaiter comes in handy. A really comfortable all day ice boot and made in Italy too. What more could you ask for and definitely Dave’s favourite winter boots!
See our review for more details and AKU for stockists.
Ice Axes – Grivel North Machines
 Last year Richie used the Grivel North Machines which performed amazingly – in fact they are pretty much the perfect pure ice climbing tool and great technical alpine tool too. Fitted with a hammer they give an effortless well balanced swing on steep ice falls. Grivel picks have always been superb and nothing has changed there – the hot forged ‘Ice Pick’ tapers down to 3mm making for easy penetration on ice but still gets a ‘T’ rating so it will put up with hooking and torquing abuse if that becomes necessary. It’s worth getting the ‘Ice Plus’ so you can bolt on the hammers to give a bit more weight at the head for hard ice penetration.
  If you want to branch out onto some of the serious mixed terrain then The Grivel Tech Machines will give you a more ‘full service’ second grip placement and a full on technical lower grip for the crazy steep stuff.
See Grivel GB for prices and availability.
Leashes – Petzl V-Link
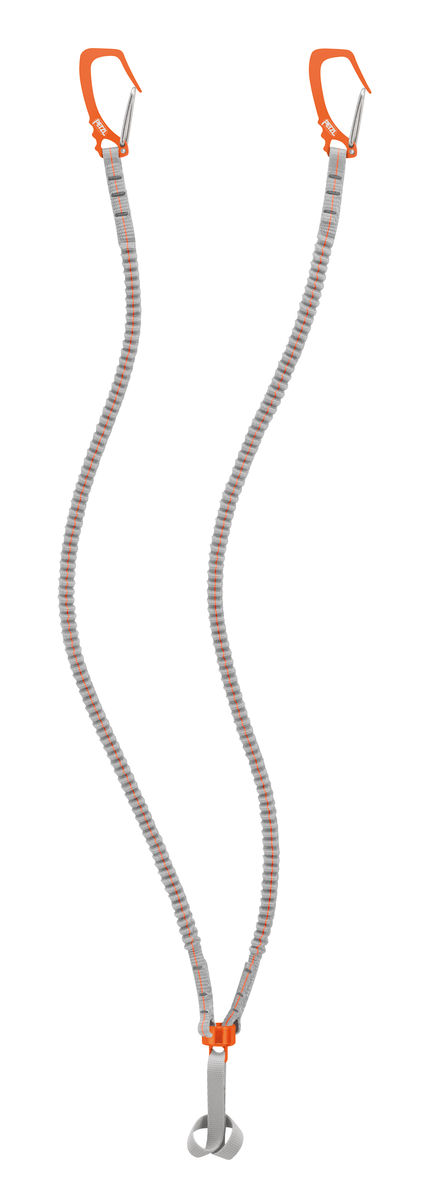 If you are climbing leashless you will certainly want to secure your axes with a good quality Y leash. Drop an axe on Cold Couloir and your day is going to go horribly wrong. The Petzl V-Link is a nicely made leash, it doesn’t look as bulky as some swivel leashes are and the included clippers are super light. In fact the whole leash weighs only 80g so you’ll hardly know you’ve got it on.The swivel seem to work well enough but I always seem to manage getting into a tangle!
See Petzl for more details and stockists.
Crampons – Grivel G20
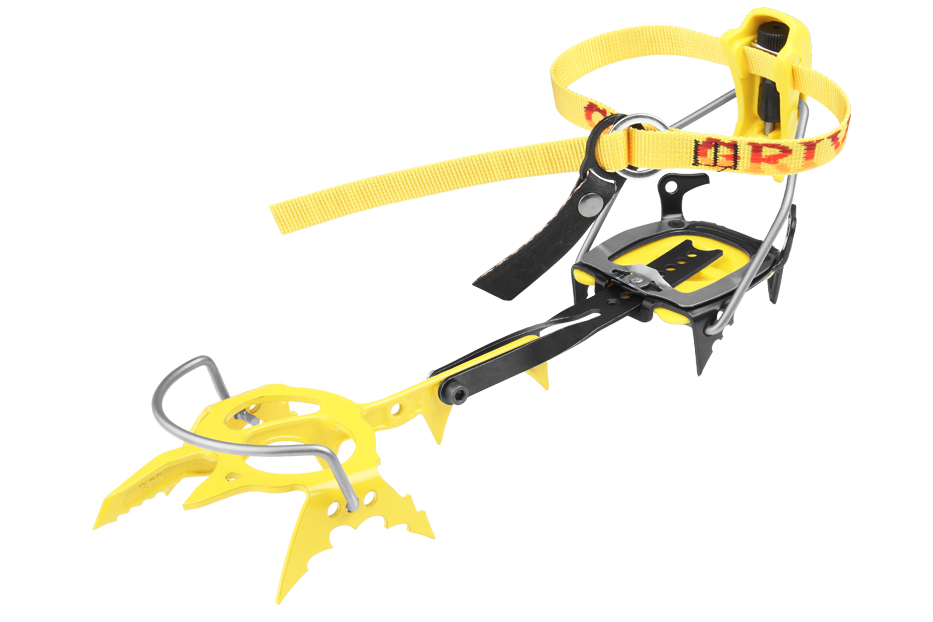 The ultimate in lightweight, technical crampons. I used twin pointed crampons and couldn’t believe the difference in weight and accuracy when I switched to the newer one piece mono points. If you are serious about ice climbing and improving your grades then lightweight boots and crampons will be a worthwhile investment. The Grivel G20 are a Cro Moly, superlight mono point crampon that fix to your boots using the Cramp-o-matic system (no straps on the toe) they are super responsive and great to wear. Top tip – when you buy them buy a spare frontpoint section so you can have a pair super sharp for ice and a pair for scratching about the Norther Corries. Oh – did I mention they are superlight -they’re 800g per pair (that’s right per pair!).
See Grivel GB for prices and availability.
Ropes – Edelrid Apus
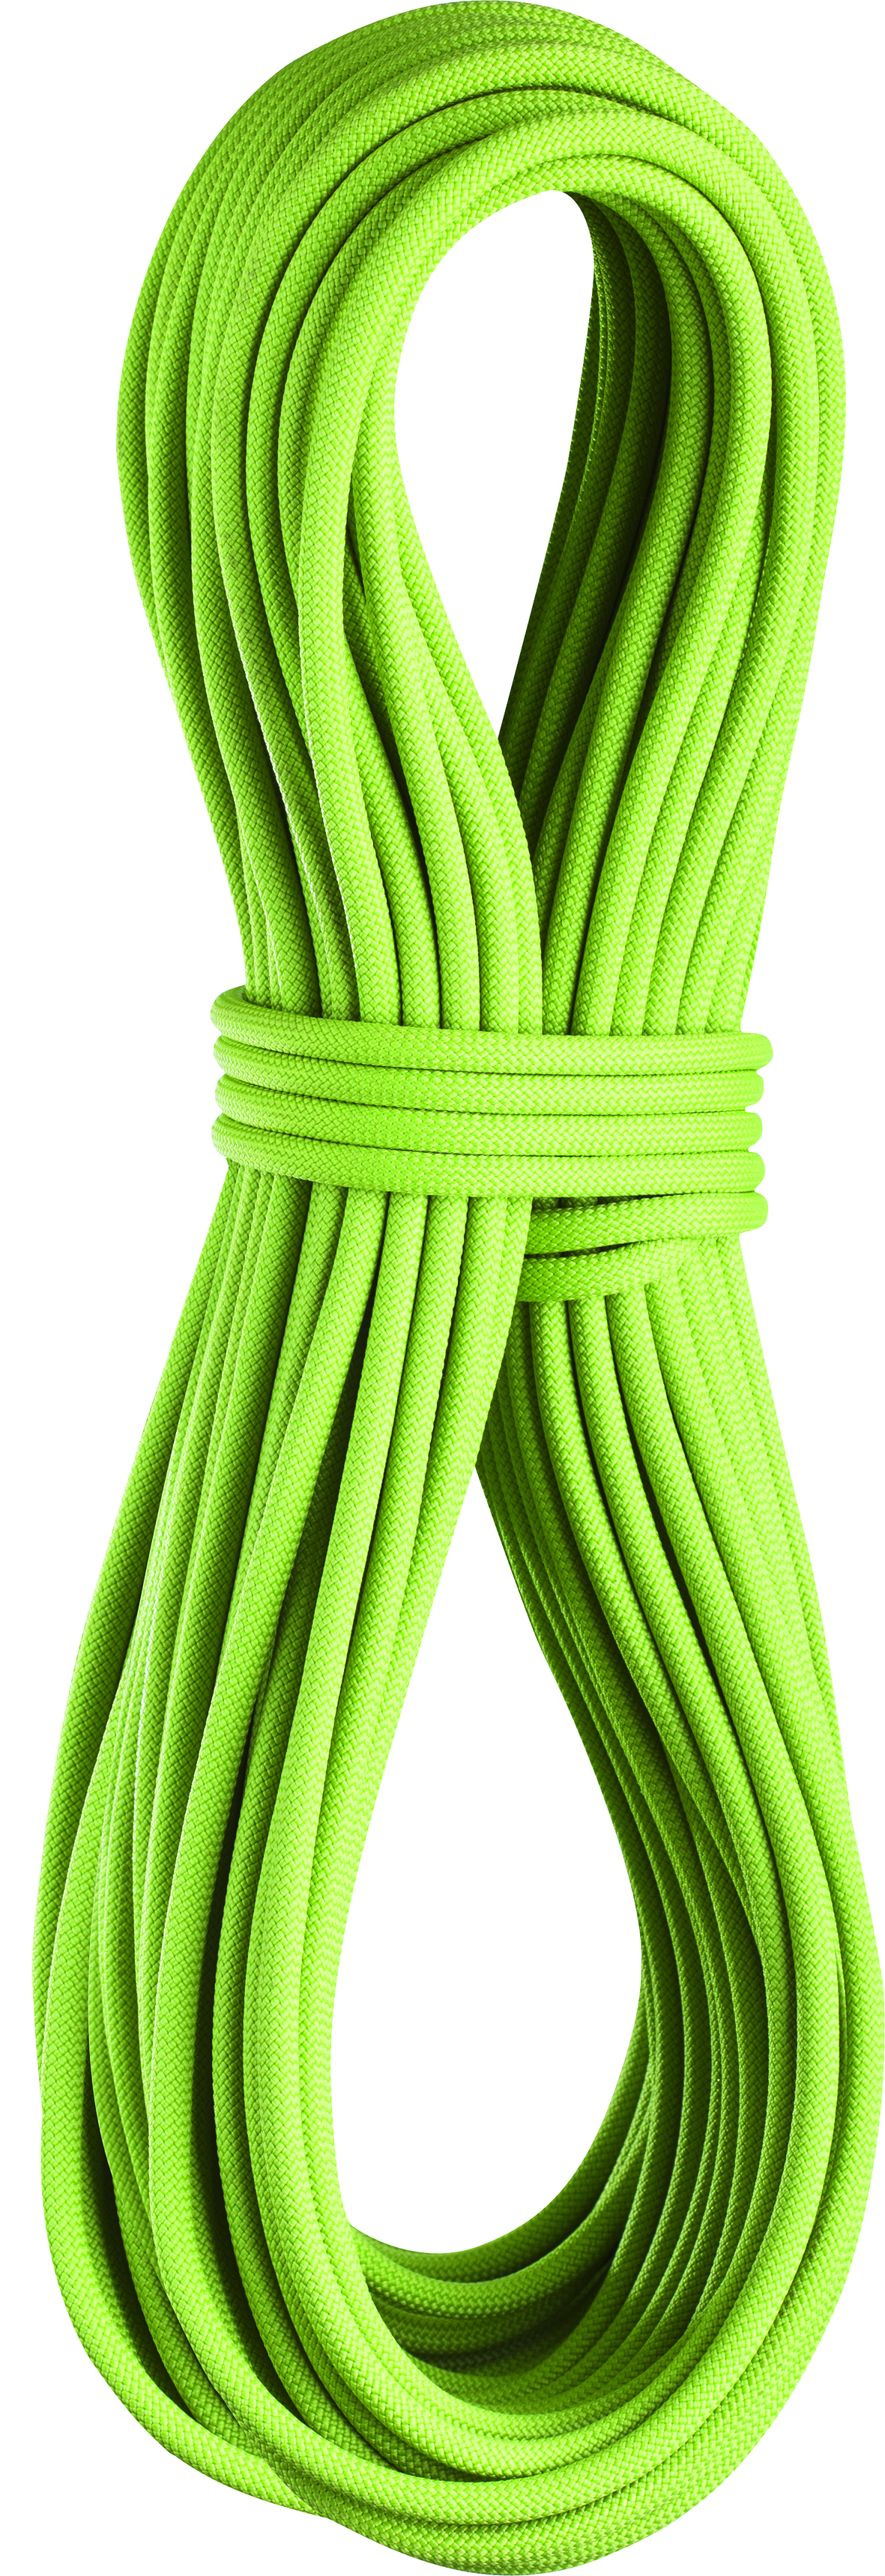 You’ll want 60m minimum ropes for Cogne both to ensure reaching some belays and to enable hassle free abseils. Last year we used the Excellent Edelrid Apus with the Pro Dry treatment (essential) but the Edelrid Skimmers that we reviewed over the summer in the Alps would probably be the ultimate ice climbing ropes providing their narrow diameter doesn’t psych you out!
You can read our full review of them here.
Gloves
Often you can get away with a lighter glove whilst leading in the sunny, dry cold of Cogne – conditions dependant of course! Outdoor research have a deserved reputation for producing a huge range of specialist climbing gloves from full on gauntlets to skinny mixed minimalist affairs. Richie has been a big fan of the original  OR Lodestar (soon to be updated for 2018) – good dexterity and the pile lining can’t invert, whilst they dry quickly tucked into a jacket a brilliant allrounder.
  For supernatural grip and dexterity on those hard leads (or if you choose some of the mixed nasties) the Alibi II is amazing but you’ll need a warm glove to belay as these provide little insulation.
Details on the Outdoor Research site
Belay Jacket
It can get chilly belaying in the shade so a good Belay Jacket will come in handy at times – just ask the Manbeast…
Arc’teryx Cerium LT Hoody
 A decent down jacket is incredibly versatile. I reviewed the original Cerium LT Hoody for CGR and have recently had the opportunity to test the newly revamped one too. It is a jacket I wear for a multitude of activities from the hill to the high street. A cold weather mid layer, or light outer layer/belay jacket in cold and dry conditions; you choose. Arc’teryx have improved the cut of the new version, it is less “boxy” and has a longer body length. Elasticised cuffs and a hem drawcord help seal out the cold. The down is top quality 850 fill power and features Composite Mapping™, which strategically places Coreloft™ synthetic insulation in moisture-prone areas such as the cuffs, armpits and shoulders. The whole thing is finished with a close fitting storm hood and weighs only 305g.
Find out more or buy one from the Arc’teryx website.
Harness – Arc’teryx AR-395A
 A great all round harness that is perfectly suited to ice climbing. Adjustable leg loops, good ice clipper slots and solid gear loops. The super wide belt is also great for hanging belays and is very comfortable for all day wear. You can read our full review of the harness here.
Helmet – Petzl Sirocco
 The featherlight Petzl Scirocco is ideal for cascade climbing, so light that you barely know it’s there on the walk in or whilst climbing and yet robust enough to put up with some abuse. The simple harness tucks out the way for packing yet provides plenty of adjustment for wearing over hoods and hats. Petzl even provide a visor to protect your eyes and upper face from falling ice which we’ve not tried but seems like a splendid idea when you’re clearing chandeliers before pulling over a curtain.
See Petzl for more details and stockists.
Top tip – bring a mini stuff sac or dry bag that will hold your belay jacket. As you’ll almost always be abseiling back to the base of your route you can leave one or both sacs there and just climb with your jacket clipped to your harness. On longer routes like Cold Couloir you’ll probably want to bring one small sac with some food and drink in though.
